


These are all my tips and tricks to making juicy Oven Baked Chicken Breast that you can meal prep and use in so many different ways! It's by far the way I make chicken most often because it's quick, easy, versatile, and pretty hands-off so you can spend your time finishing the rest of dinner while it bakes!
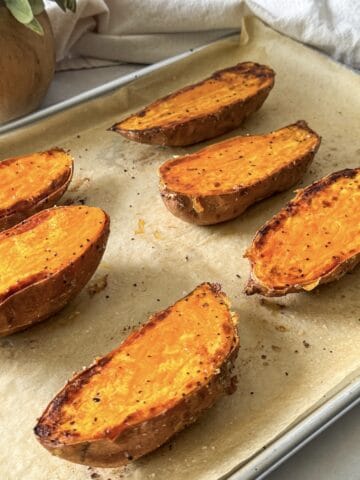
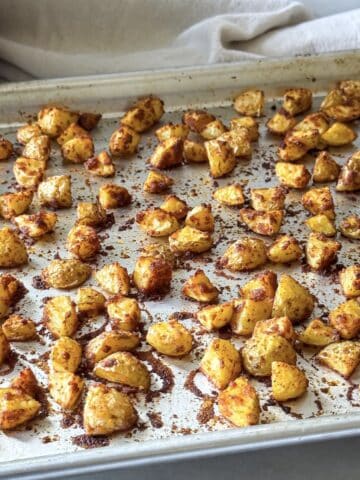
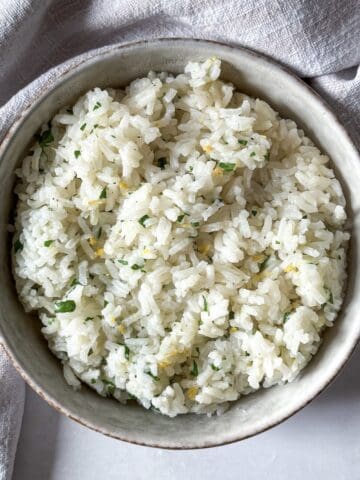
As a dietitian, I aim to get protein at each meal, and one of my favorite lean proteins to use is chicken breasts. I use it for chicken salads, to top grain bowls, a Mediterranean quinoa salad, or green salads, or to make a balanced plate with some of my favorite sides like lemon garlic rice or cilantro lime rice & black bean pico de gallo, a spring orzo pasta salad, or roasted broccoli and sweet potato halves or roasted diced baby potatoes.
For a long time, I really struggled with figuring out an easy way to make chicken that didn't either take a lot of steps or turned out dry or bland. And chicken breast can be cooked in so many different ways from being pan seared or started in the pan and finished in the oven, cooked in a slow cooker, an air-fryer, or on the grill. But I find the easiest way to make chicken for meal prep during the week is to bake it in a casserole dish. So after some research and a lot of trial and error over the years, this is how I make sure I end up with baked chicken that actually tastes amazing and retains moisture. Say it with me: NO. MORE. DRY. BLAND. CHICKEN. 👏🏼
More Meal Prep Chicken Breast Recipes
- Greek Yogurt Chicken Marinade
- Oven Baked Thinly Sliced Chicken Breasts
- Slow Cooker Shredded Chicken
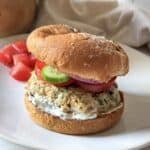
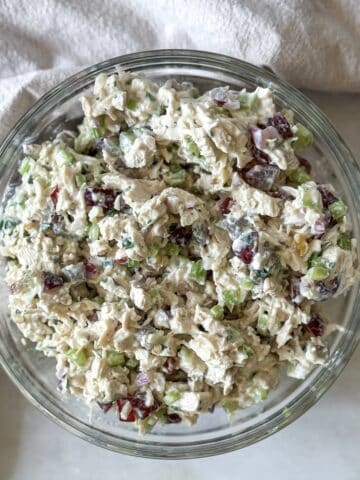
- Healthier Basic Chicken Salad
Jump to:
Key Ingredient Notes and Substitution Ideas
This oven baked chicken breast recipe is made with simple ingredients. Below are some ingredients notes. Check the recipe card at the bottom of this post for the measurements.
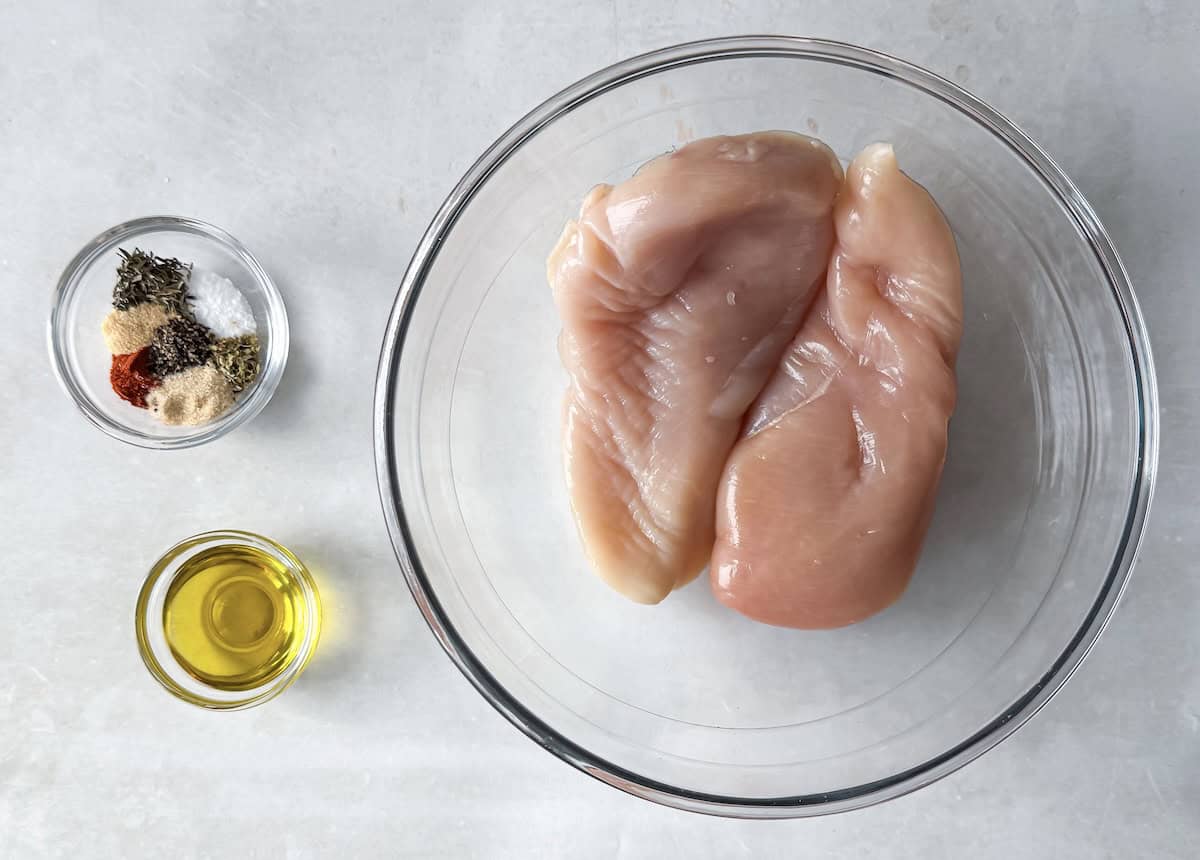
- Chicken Breast - this recipe uses boneless, skinless chicken breasts which are easy to find at most grocery stores. I look for air chilled, organic, pasture raised chicken for the best quality. While chicken thighs are a great option too, I tend to use a lot of chicken breast because they're a bit more lean.
- Extra-Virgin Olive Oil - just a small bit of olive oil helps the seasonings stick and ensures the chicken stays nice and moist while it bakes instead of drying out. You can substitute with avocado oil or your favorite cooking oil.
- Kosher Salt & Black Pepper - salt and pepper is the base of seasoning. Salt does more than just season the meat! It also helps prevent the chicken from drying out and makes it more tender. I use Morton's kosher salt, but included notes for different kinds of salt including Diamond Crystal kosher salt and fine table salt in the recipe card below.
- Additional Seasonings - the secret to well seasoned chicken (besides salt) is a great blend of seasonings that work well together and add flavor to the meat. I like to use a simple seasoning blend of dried oregano, dried thyme, paprika, garlic powder, and onion powder for baked chicken.
How to Make Oven Baked Chicken Breasts
Below are the directions for how to make juicy oven baked chicken perfect for meal prep with photos and tips that I hope are helpful. Check the recipe card at the bottom of this post for the full recipe.
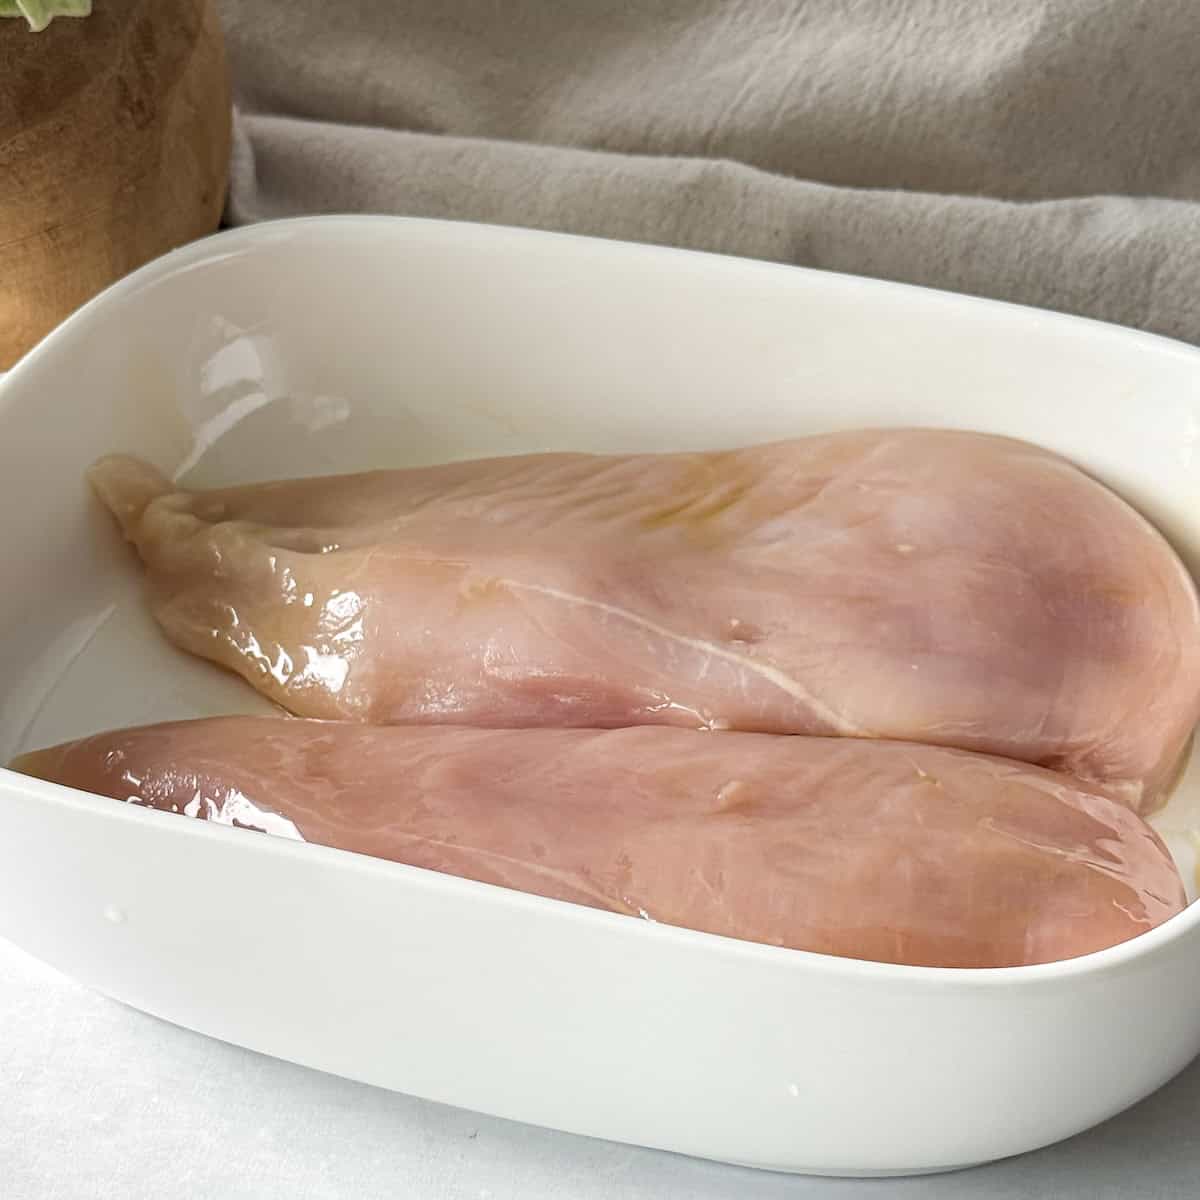
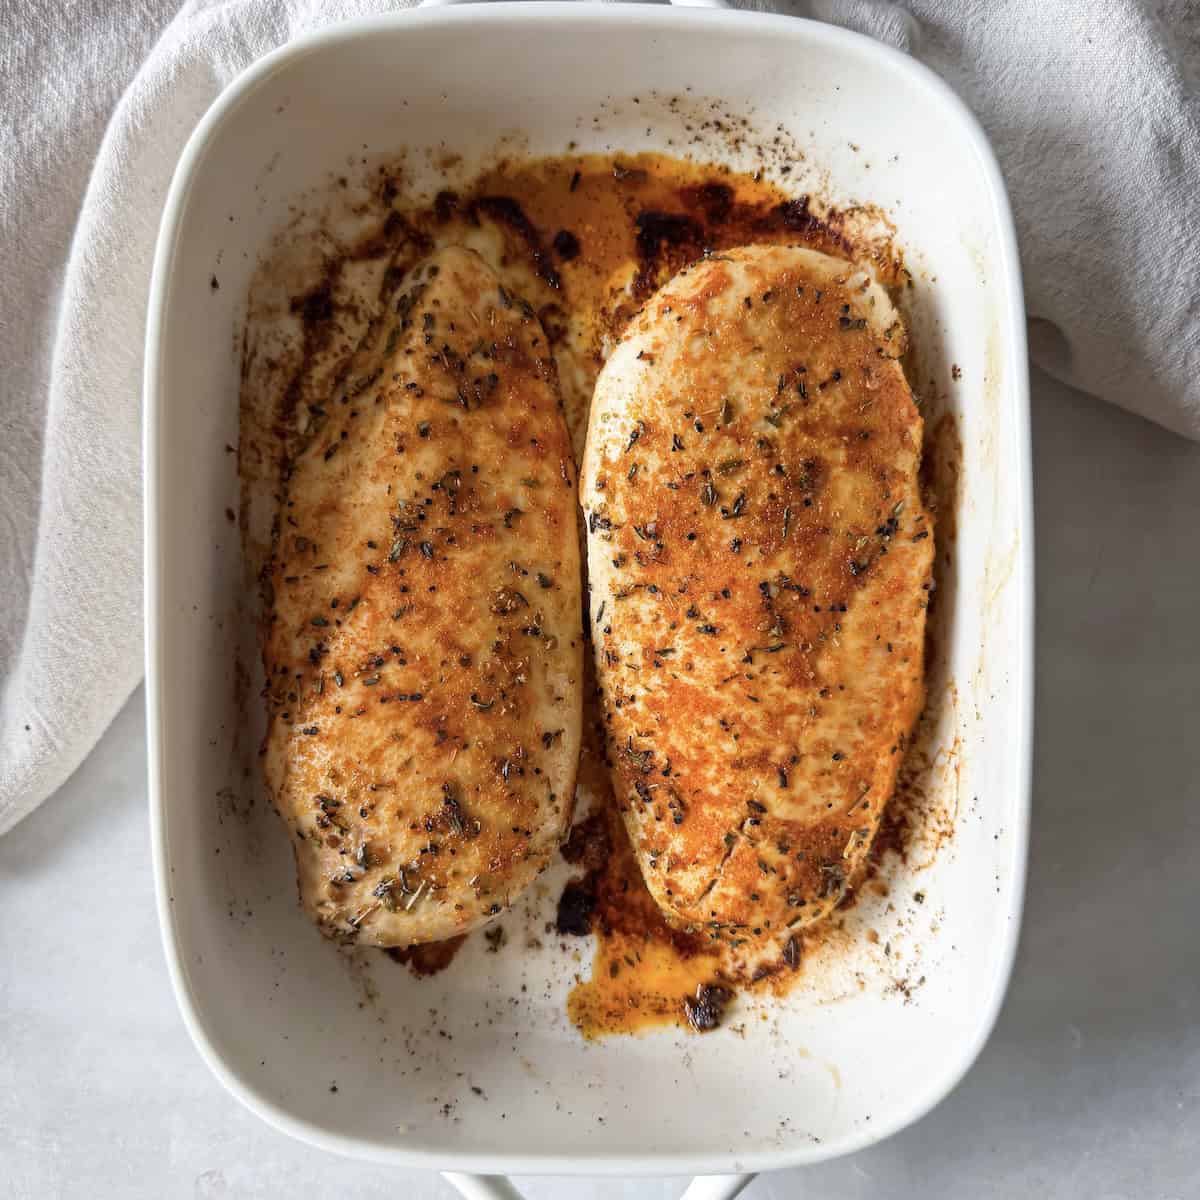
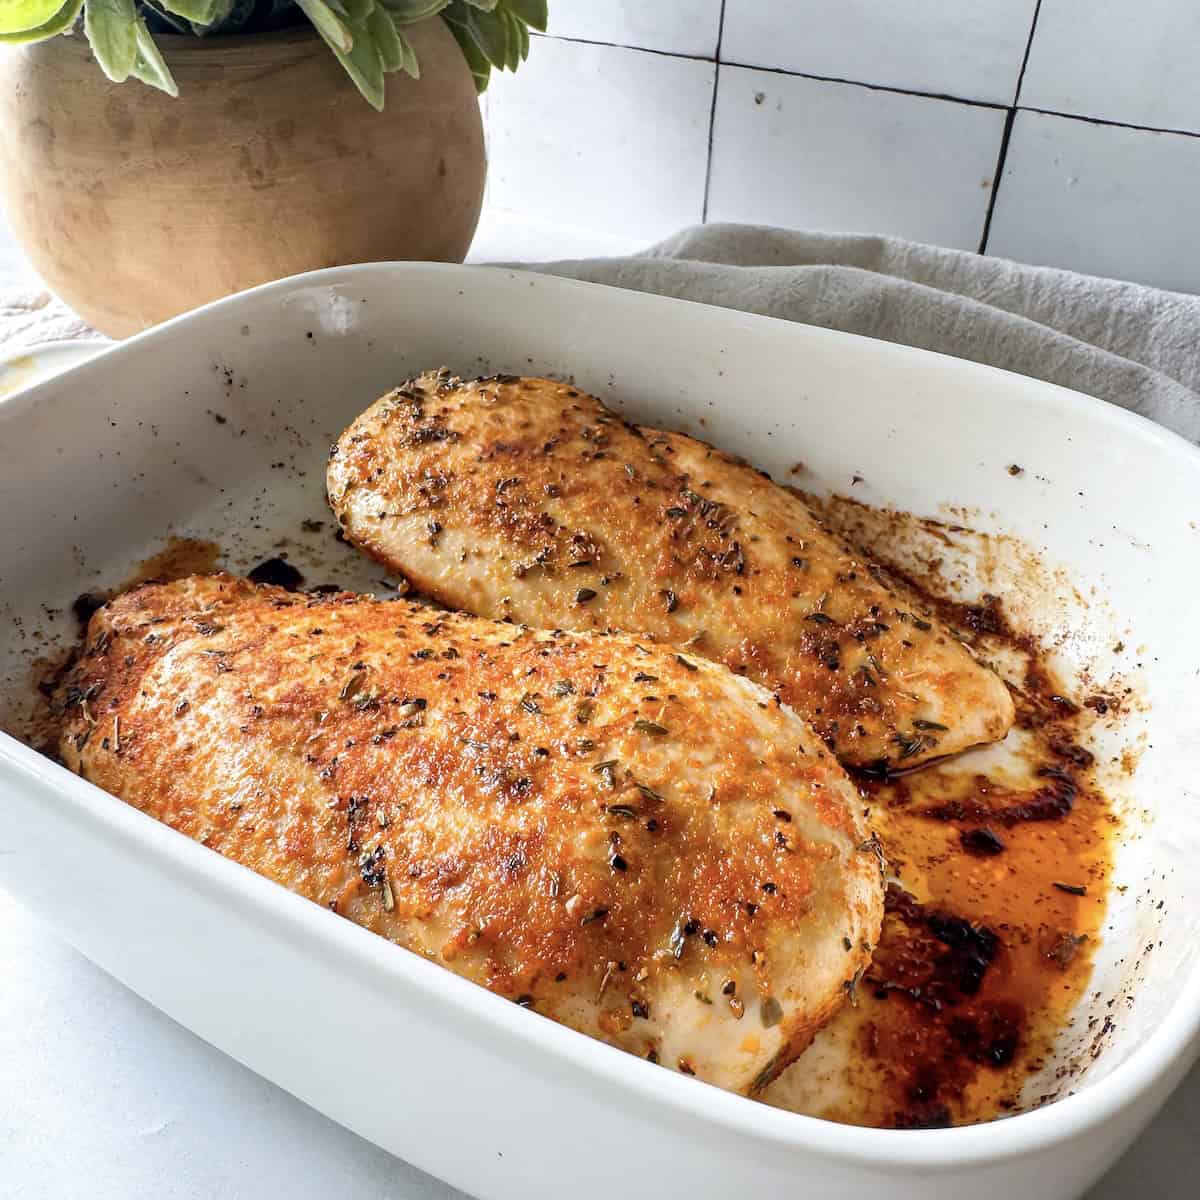
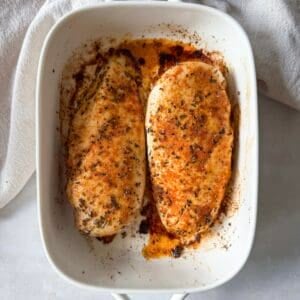
- Step 1: Preheat the oven to 425℉ (218°C). Gently pat the chicken dry with paper towels and place it in a baking dish in a single layer. Lightly coat both sides of the chicken breasts in olive oil.
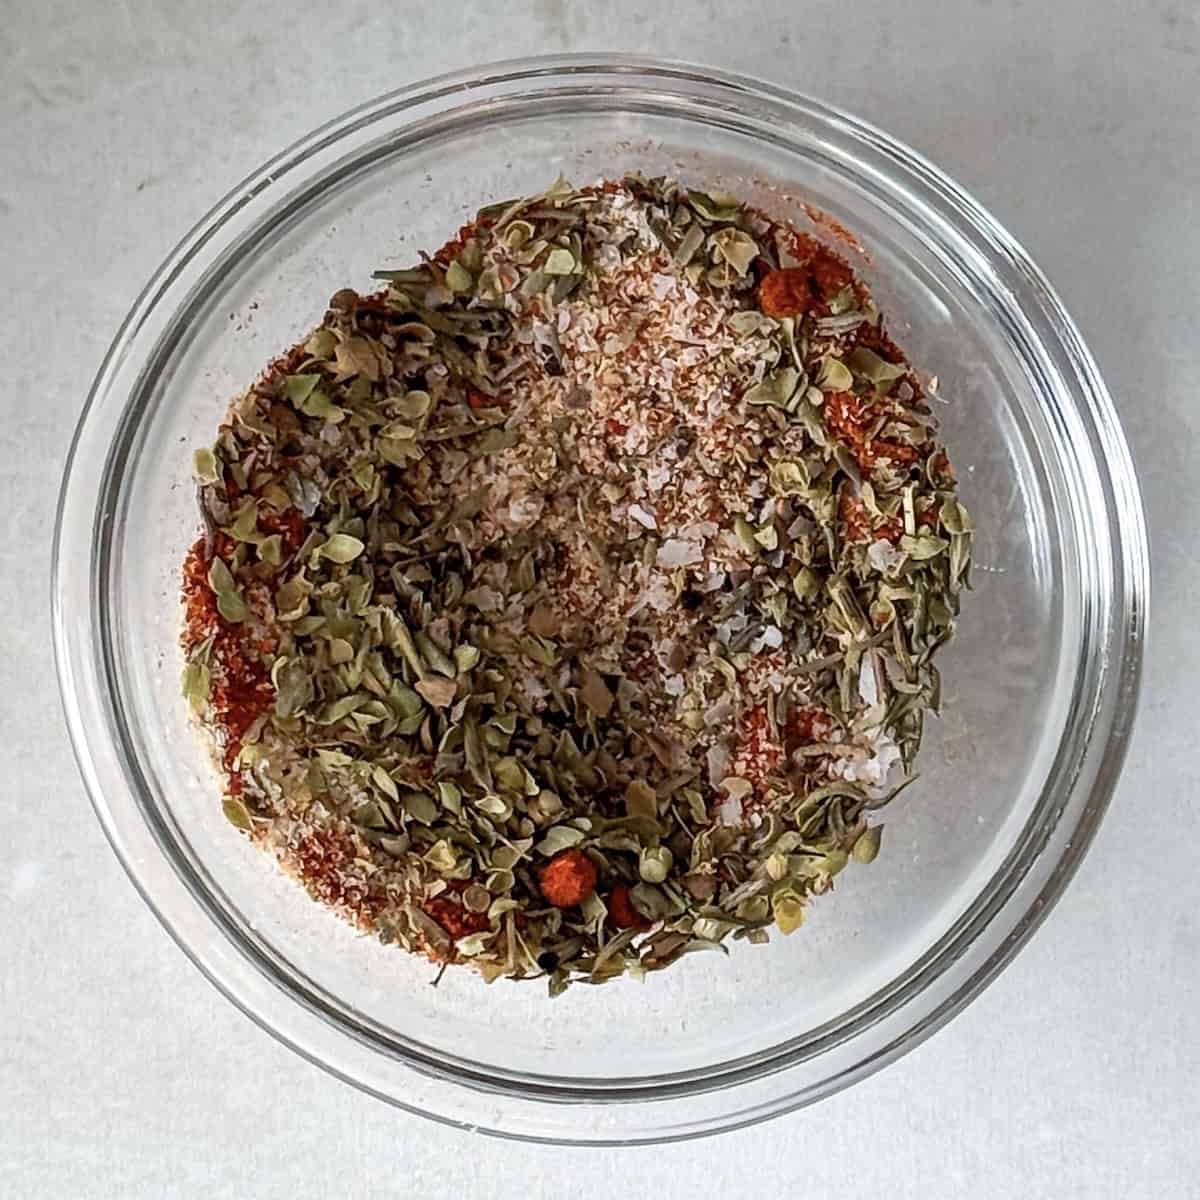
- Step 2: In a small bowl, combine the seasoning mixture. Season both sides of the chicken and pat the seasoning mixture into the chicken.
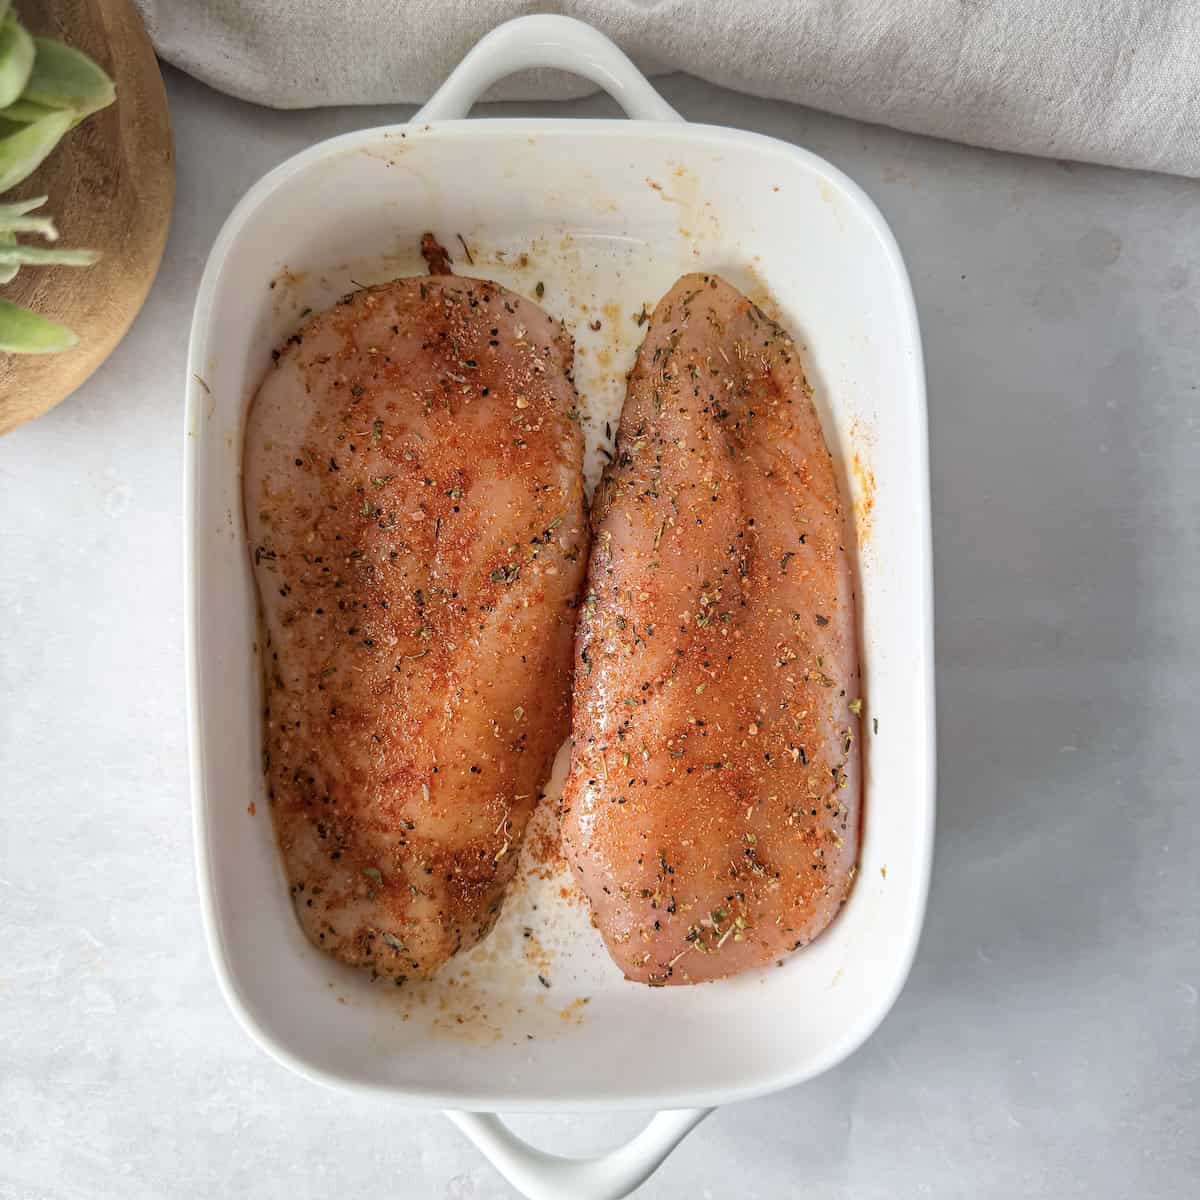
- Step 3: For best results, let the seasoned chicken breasts sit for 15-30 minutes. This will allow the salt to penetrate into the chicken which helps it get more flavorful and juicy.
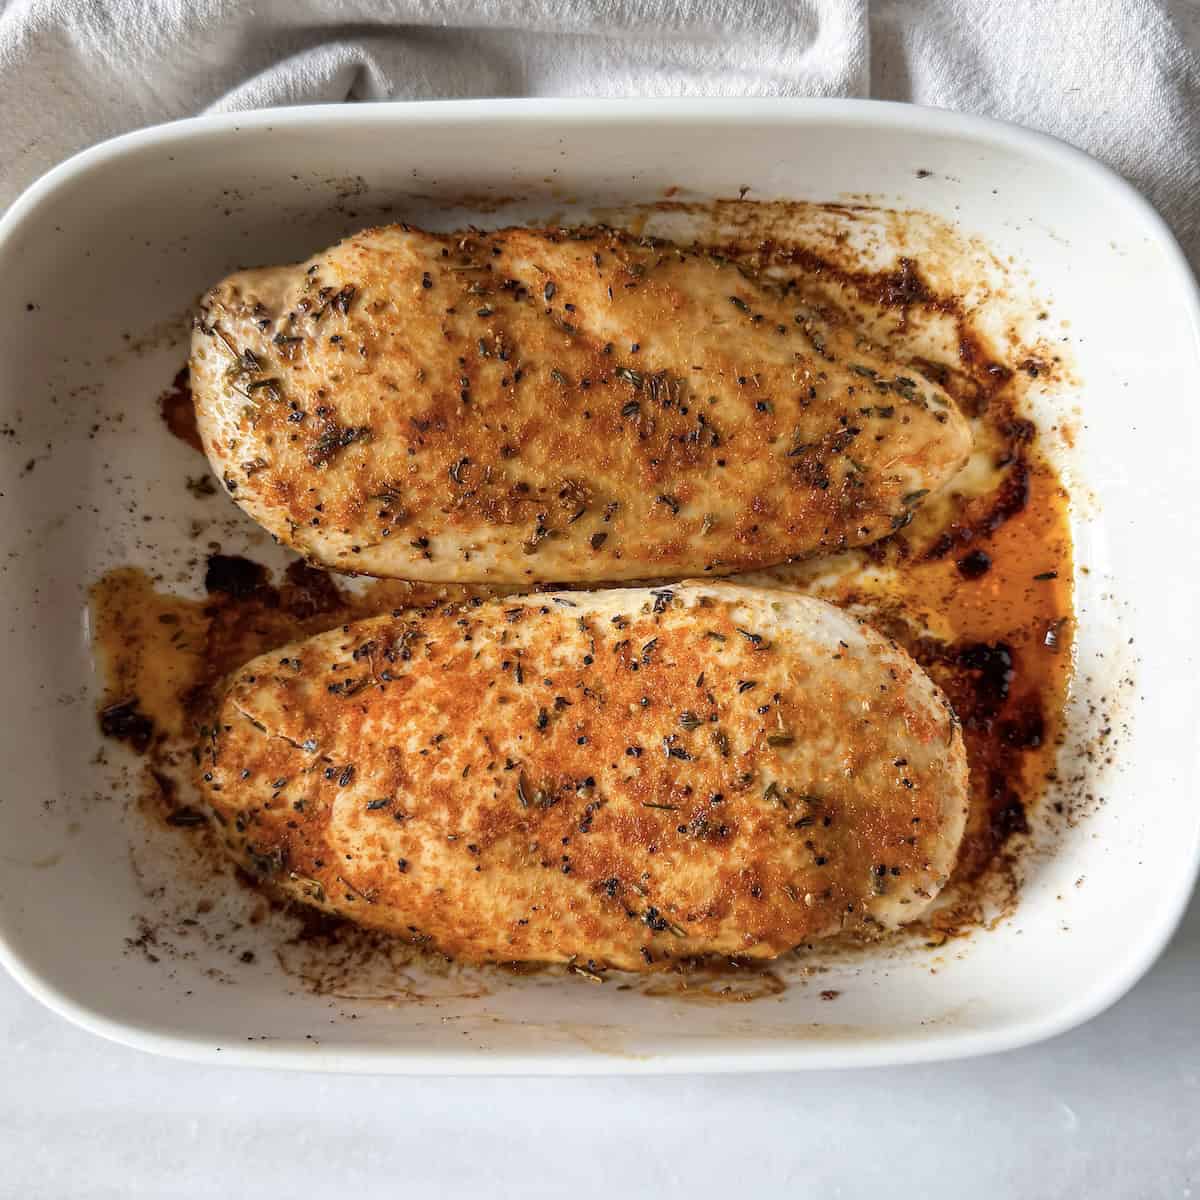
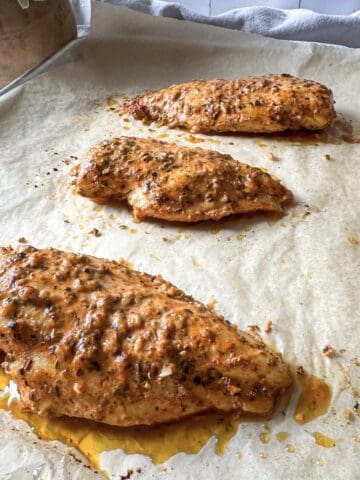
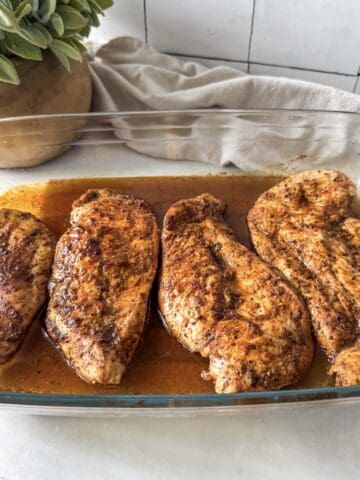
- Step 4: Bake the chicken for 18-25 minutes, flipping halfway through and again at the end for best results. Cooking time will vary depending on your oven and the thickness of the chicken. Smaller chicken breasts will cook quicker than large ones. The chicken is done when the internal temperature is 165℉ (75°C). Let the chicken sit at least 10 minutes after it comes out of the oven. This helps the juices redistribute into the chicken to prevent it from drying out. When cutting the chicken, slice against the grain.
Hint: for the juiciest, most flavorful chicken, my 2 tips are to season it ahead of time (or at least add the salt ahead of time), and use a meat thermometer to avoid overcooking because it can go from juicy to dry very quickly.
Dietitian Tip
Chicken breast is an easy source of lean protein and other nutrients including iron, selenium, and vitamin B6. Pair it with complex carbohydrates & heart healthy fats. Add veggies and a good sauce or dressing to turn it into a balanced meal!
Variations
The best part about making oven-baked chicken breast at home is you can customize it according to your taste! Below are some ideas.
- Smoky - replace the regular paprika with smoked paprika and add cumin and chili powder for a more smoky flavor that will pair well with Mexican food.
- Mediterranean - the spice blend I use already leans Mediterranean, but if you want to go all-in, add a squeeze of lemon and dried basil, ground coriander, or cumin.
- Italian - skip the paprika and add dried basil and a sprinkle of parmesan cheese to give it a chicken parmesan feel.
- Add some sweetness - adding sugar will help the chicken breasts to get a nice brown exterior. You can accomplish this with brown sugar or a little maple syrup or honey added toward the end of cooking.
- Spicy - if you like spicy food, add cayenne pepper and chili powder to the seasoning mixture.
Ideas for Serving Oven Baked Chicken Breasts
Once you have a batch of chicken made, you can use it in so many different ways. Below are some of my favorites to give you ideas!
- On a Farmer's Plate - use the chicken as the protein and serve it with your favorite 2-3 side dishes. Some ideas are roasted sweet potatoes and roasted broccoli or cauliflower & carrots, cilantro lime rice and black bean pico
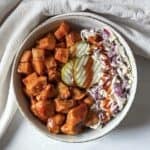
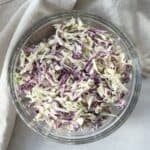
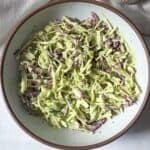
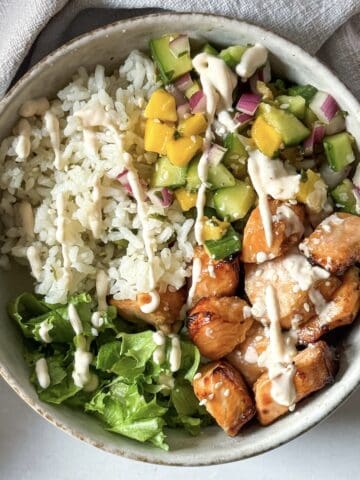
- BBQ Chicken Bowl - I love thinly slicing the chicken and having it with diced sweet potatoes or roasted baby potatoes and avocado coleslaw or coleslaw with Greek yogurt and BBQ sauce on top.
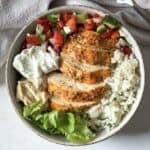
- In a Greek Chicken Bowl - add it to a bowl with a cucumber tomato feta salad or white bean salad and roasted potatoes. Serve with a yogurt dill sauce and homemade hummus.
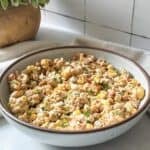
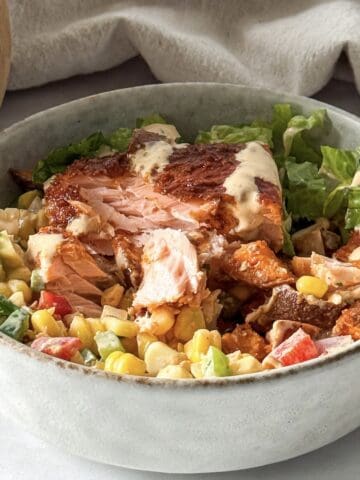
- Street Corn Inspired Chicken Bowl - bake the chicken and make a street corn salad and cilantro lime rice to serve it with! You can also do pan-seared chicken for this like in my Street Corn Inspired Chicken Rice Bowls recipe.
- On a Salad - use the chicken to add protein to a Kale & White Bean Salad, super greens salad, kale harvest salad, roasted beet and squash arugula salad, simple spinach and arugula salad, or chickpea cucumber salad.
- In Pasta Dishes - the oven baked chicken breast is a great protein option to add to green goddess pasta salad, Elote pasta salad, spring orzo salad, pesto pasta salad, a mushroom spinach orzo, or pasta with green pasta sauce.
- Add Protein to Grain Bowls - I add it to my favorite quinoa bowl with roasted chickpeas & broccoli with a lemon tahini dressing. It works great in my Nourish Bowls made with roasted carrots and cauliflower too.
- In a Harvest Bowl - in the fall, serve it with bone broth rice and either roasted brussels and butternut squash, tender roasted beets, or a vegetable medley with sweet potatoes, brussels sprouts, cauliflower, and apples.
Equipment
One of the most important pieces of equipment for getting the most perfectly juicy chicken breasts is a meat thermometer to measure the internal temperature of the chicken. This is the best way to prevent undercooking or overcooking the chicken. Here's the instant read thermometer I use. You'll also need a baking dish that's large enough for the chicken breasts to fit with a bit of space between.
Storage for Oven Baked Chicken Breasts
- Refrigerator - store cooked chicken in an airtight container in the fridge for up to 3-4 days.
- Freezer - store cooked chicken in the freezer in a freezer safe container for up to 3 months. Slice or dice the chicken before freezing to make it easier on yourself!
- To Reheat - thaw in the fridge overnight and reheat in the oven or in the microwave. To prevent it from drying out in the microwave, you can add a splash of broth or water.
Expert Tips for the Best Baked Chicken Breasts
Taking a couple extra steps can make a big difference in how the chicken breasts taste. The two biggest concerns with baking chicken breasts in the oven are that they will either be dry or bland. So here's my best tips to ensure juicy baked chicken breast every time!
- If your chicken breasts are noticeably different in size where one is a lot bigger or a single breast is much thicker in the center than the sides, pound them out to ensure even thickness for even cooking. The easiest way is to cover the chicken with either parchment paper or plastic wrap or put it in a large ziplock bag. Then pound the chicken using either a mallet, rolling pin, or the bottom of a heavy pan. Start with the thickest part of the chicken and pound it outward toward the thinner part.
- Coat both sides of the chicken in a little olive oil and season both sides of the chicken. I used to not coat my chicken in olive oil because I didn't realize how big of a difference even a little bit of oil can make. It helps the seasonings to stick and also helps the chicken retain moisture and brown while it bakes.
- For the best flavor throughout the whole chicken breast, season as far in advance as you can (up to 24 hours). The salt in particular helps to draw out moisture that will then redistribute into the meat to keep it juicy. Salt will also penetrate inside the chicken breast as it sits. So even if you only salt it in advance, it makes a big difference.
- Even seasoning the chicken breasts 30-60 minutes in advance of baking it makes a big difference!
- Use a baking dish rather than a baking sheet or sheet pan in order to keep the moisture locked in. If a baking sheet is all you have, it will work but if you're choosing between the two go with the baking dish.
- Cooking at a high temperature helps the chicken retain moisture so I usually cook it at a high heat of 425℉ (218°C) for a shorter time rather than 400℉ (200°C) for a longer time.
- Flip the chicken breasts halfway through cooking and then flip them again right after the get out of the oven.
- Don't skip the step of letting them cool in the baking dish for around 10 minutes before cutting into them. It sounds counterintuitive, but if you cut into them too quickly the moisture will come out when you cut them. But if you wait the juice will redistribute throughout the meat.
- Once the chicken has cooled at least 10 minutes, transfer it to a cutting board and slice it. When you slice the chicken, do so against the grain by looking at the direction the muscle fibers are running (they look like faint lines). Cut in the opposite direction.
- Some people suggest to remove the chicken from the oven once it reaches an internal temperature of 160℉ and let it continue to cook up to 165℉ (75°C) as it cooks. This works! Just make sure it reaches 165℉ (75°C) from a food safety perspective.
FAQ
While healthy means something different to everyone, chicken breasts are nutrient-rich option. They are a lean source of protein and also provide important nutrients like zinc, selenium, and B vtiamins.
I provided a lot of tips in the section above, but if I had to choose just one for preventing dryness it would be to not overcook it. It's worth it to invest in a meat thermometer (they aren't very expensive) and ensure the chicken doesn't get overcooked.
If I had to pick one tip for preventing bland chicken breasts it would be to salt it early. Salt seasons chicken from within so if you add it right before cooking, it will basically just be on the surface and won't penetrate the inside of the chicken. The other seasonings help with flavor too, but even if you add tons of seasoning, your chicken will be bland without salt.
Related
Looking for other dietitian recipes like this? Try these:

Perfect for Pairing
These are my favorite dishes to serve with Oven Baked Chicken Breast:


I hope you enjoy this recipe as much as I do! I would love to hear from you! If you made this recipe, please leave me a review below or tag me in a photo or story on Instagram. Your reviews help support me and make it possible for me to continue to create the recipes you know and love. 🙂 IG: @mallorythedietitian
📖 Recipe
Oven Baked Chicken Breast, How to Make it Juicy
Equipment
Ingredients
- 1 lb chicken breasts (~2 medium sized chicken breasts)
- ½ tablespoon extra virgin olive oil
- ¾ teaspoon Morton's kosher salt (if using fine table salt, use ½ teaspoon and if using Diamond Crystal kosher salt, use 1 tsp)
- ¼ teaspoon black pepper
- ½ teaspoon garlic powder
- ½ teaspoon onion powder
- ½ teaspoon dried thyme
- ½ teaspoon dried oregano
- ½ teaspoon paprika
Instructions
- Preheat the oven to 425℉ (218°C). Gently pat the chicken dry with paper towels and place it in a baking dish in a single layer. Lightly coat both sides of the chicken breasts in olive oil.
- In a small bowl, combine the seasoning mixture. Season both sides of the chicken and pat the seasoning mixture into the chicken.
- For best results, let the seasoned chicken breasts sit for 15-30 minutes. This will allow the salt to penetrate into the chicken which helps it get more flavorful and juicy.
- Bake the chicken for 18-25 minutes, flipping halfway through and again at the end for best results. Cooking time will vary depending on your oven and the thickness of the chicken. Smaller chicken breasts will cook quicker than large ones. The chicken is done when the internal temperature is 165℉ (75°C). Let the chicken sit at least 10 minutes after it comes out of the oven. This helps the juices the redistribute into the chicken to prevent it from drying out. Cut the chicken against the grain.
- Hint: For the juiciest, most flavorful chicken, my 2 tips are to season it ahead of time (or at least add the salt ahead of time), and use a meat thermometer to avoid overcooking because it can go from juicy to dry very quickly.
Notes
- If your chicken breast is thicker in the center or one side, pound it to even thickness. Cover it with parchment paper or plastic wrap or put it in a large ziplock bag. Then pound using a mallet, rolling pin, or bottom of a heavy pan.
- Coat both sides of the chicken in the olive oil and seasonings both sides of the chicken.
- For the best flavor throughout the whole chicken breast, season as far in advance as you can (up to 24 hours). The salt in particular helps to draw out moisture that will then redistribute into the meat to keep it juicy. Salt will also penetrate inside the chicken breast as it sits. So even if you only salt it in advance, it makes a big difference.
- Even seasoning the chicken breasts 30-60 minutes in advance of baking it makes a big difference!
- Use a baking dish rather than a baking sheet or sheet pan in order to keep the moisture locked in.
- Flip the chicken breasts halfway through cooking and then flip them again right after the get out of the oven.
- Let it cool in the baking dish for around 10 minutes before cutting into the chicken.
- When you slice the chicken, do so against the grain. To do so, look at the direction the muscle fibers are running (they look like faint lines). Cut in the opposite direction.
- Refrigerator - store cooked chicken in an airtight container in the fridge for up to 3-4 days.
- Freezer - store cooked chicken in the freezer in a freezer safe container for up to 3 months. Slice or dice the chicken before freezing to make it easier on yourself!
- To Reheat - thaw in the fridge overnight and reheat in the oven or in the microwave. To prevent it from drying out in the microwave, you can add a splash of broth or water.

Comments
No Comments